Deploying a Smart Contract with Remix
This guide will walk you through deploying a smart contract on Ink using Remix IDE, a popular browser-based development environment for Ethereum smart contracts.
What is Remix?
Remix IDE is a powerful, open-source tool that helps you write, compile, deploy, and debug Solidity smart contracts. It's particularly useful for beginners as it requires no setup and runs directly in your browser.
Accessing Remix
- Open your web browser and navigate to Remix IDE
- You'll see the default workspace with some example contracts
Creating Your First Contract
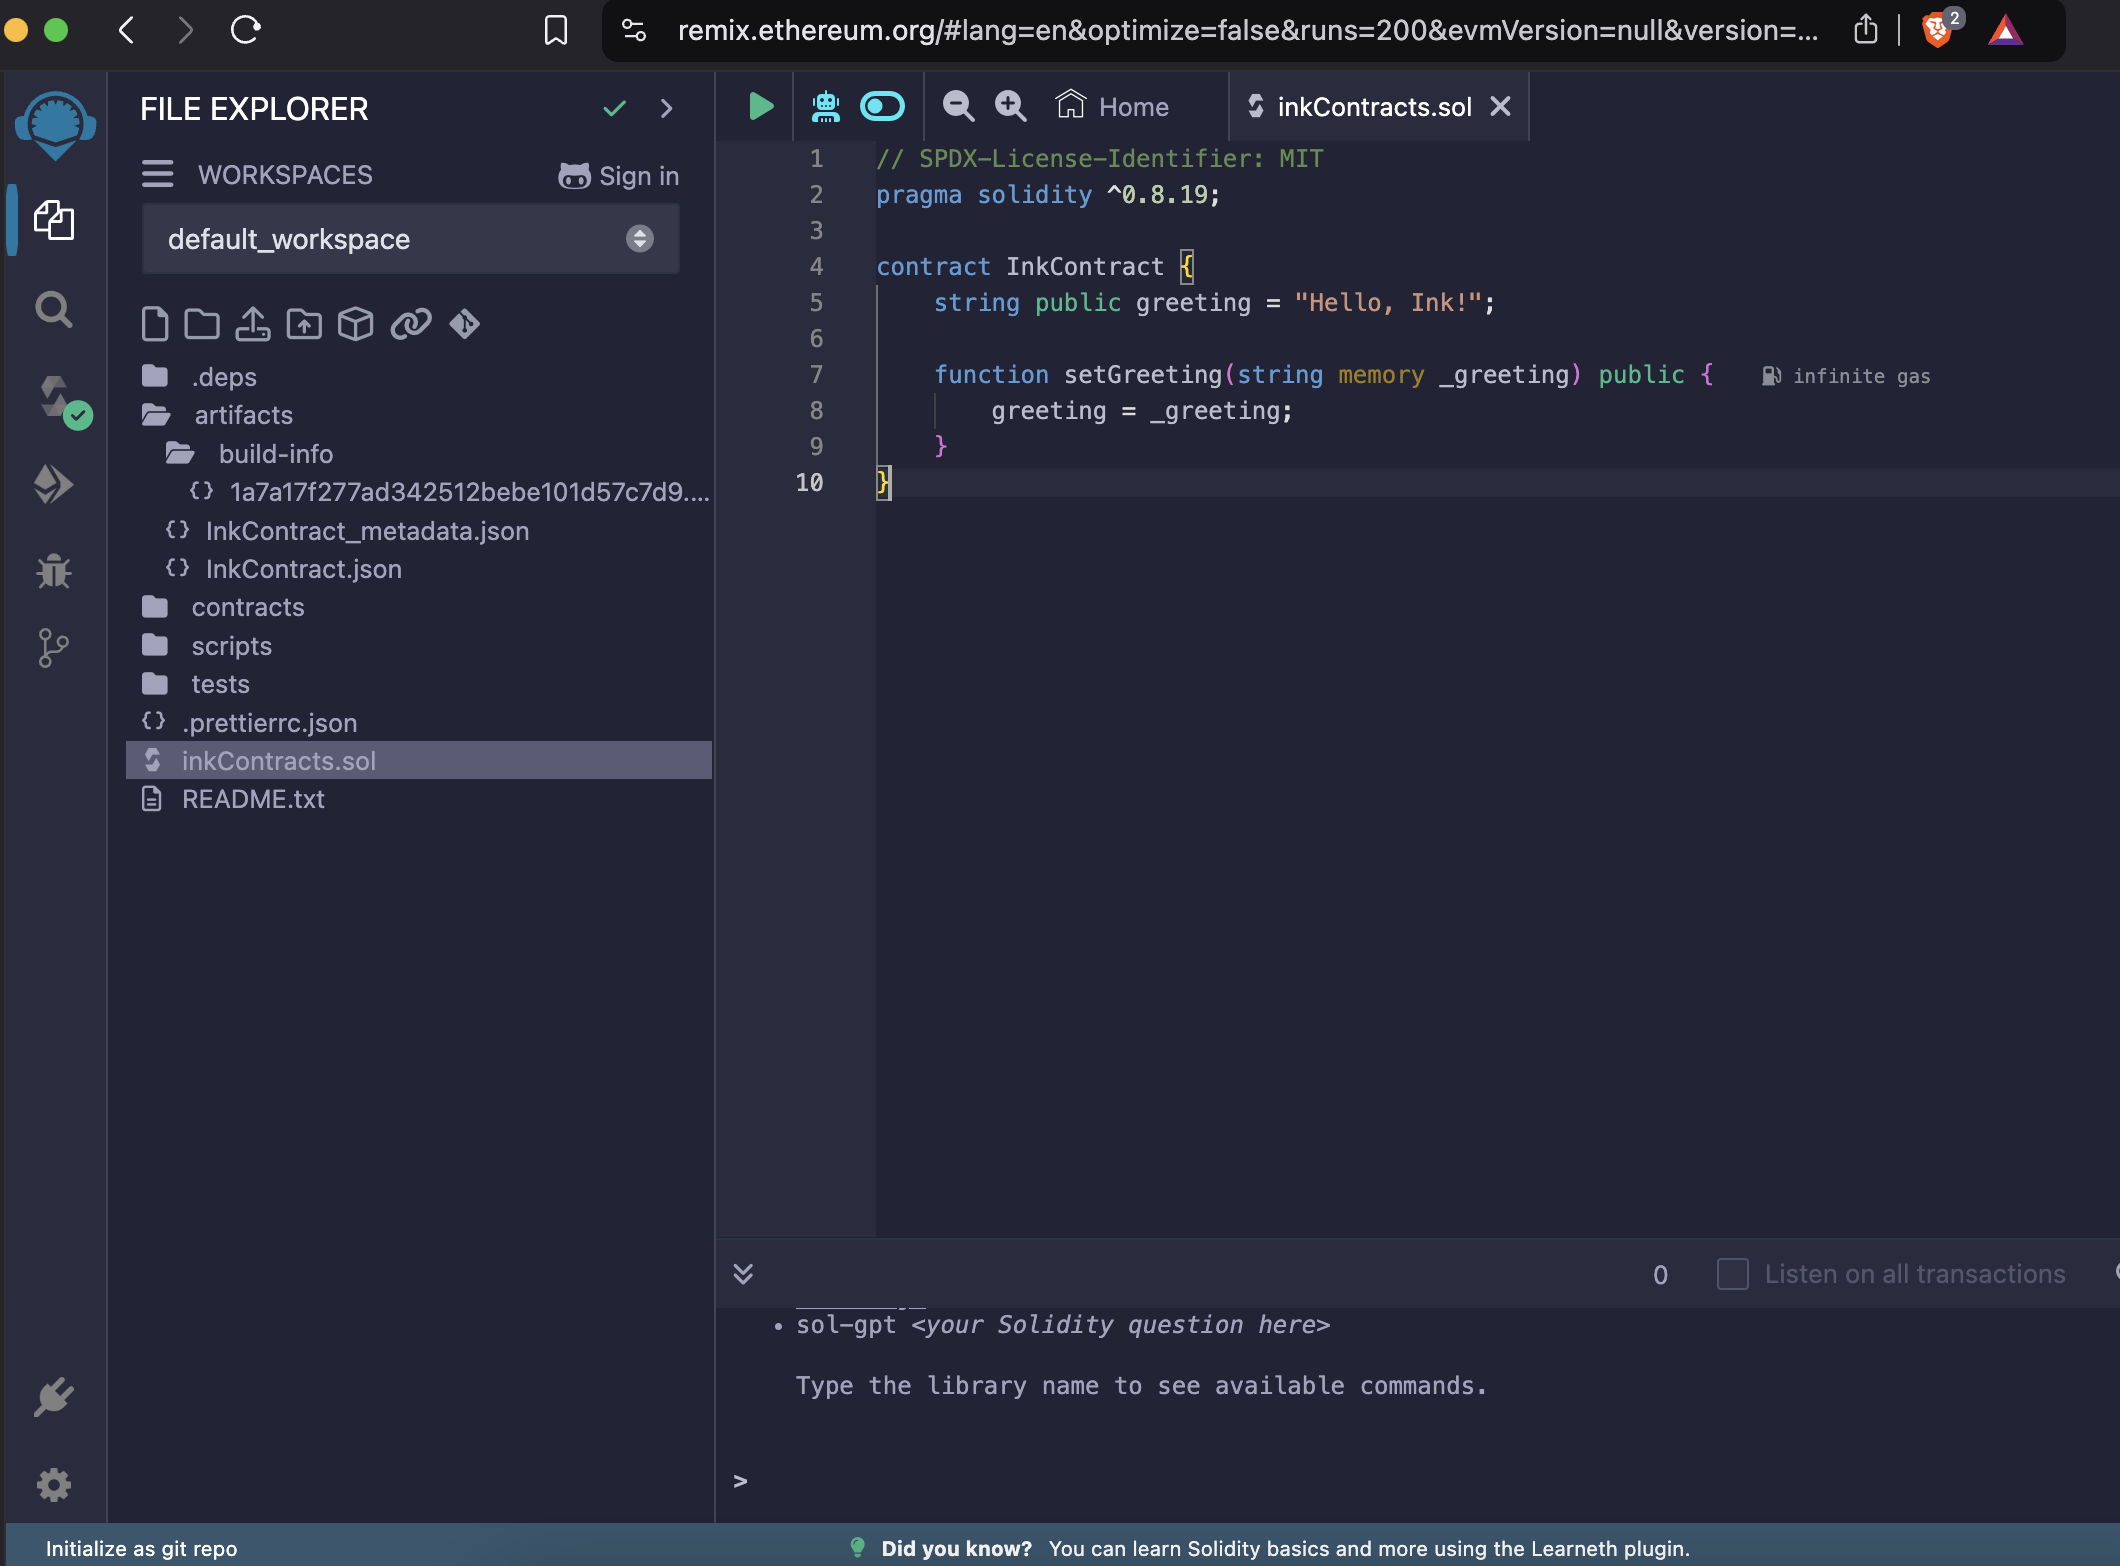
- In the File Explorer (left sidebar), create a new file by clicking the "+" icon
- Name it
InkContract.soland add the following code:
// SPDX-License-Identifier: MIT
pragma solidity ^0.8.19;

contract InkContract {
    string public greeting = "Hello, Ink!";

    function setGreeting(string memory _greeting) public {
        greeting = _greeting;
    }
}
Compiling Your Contract
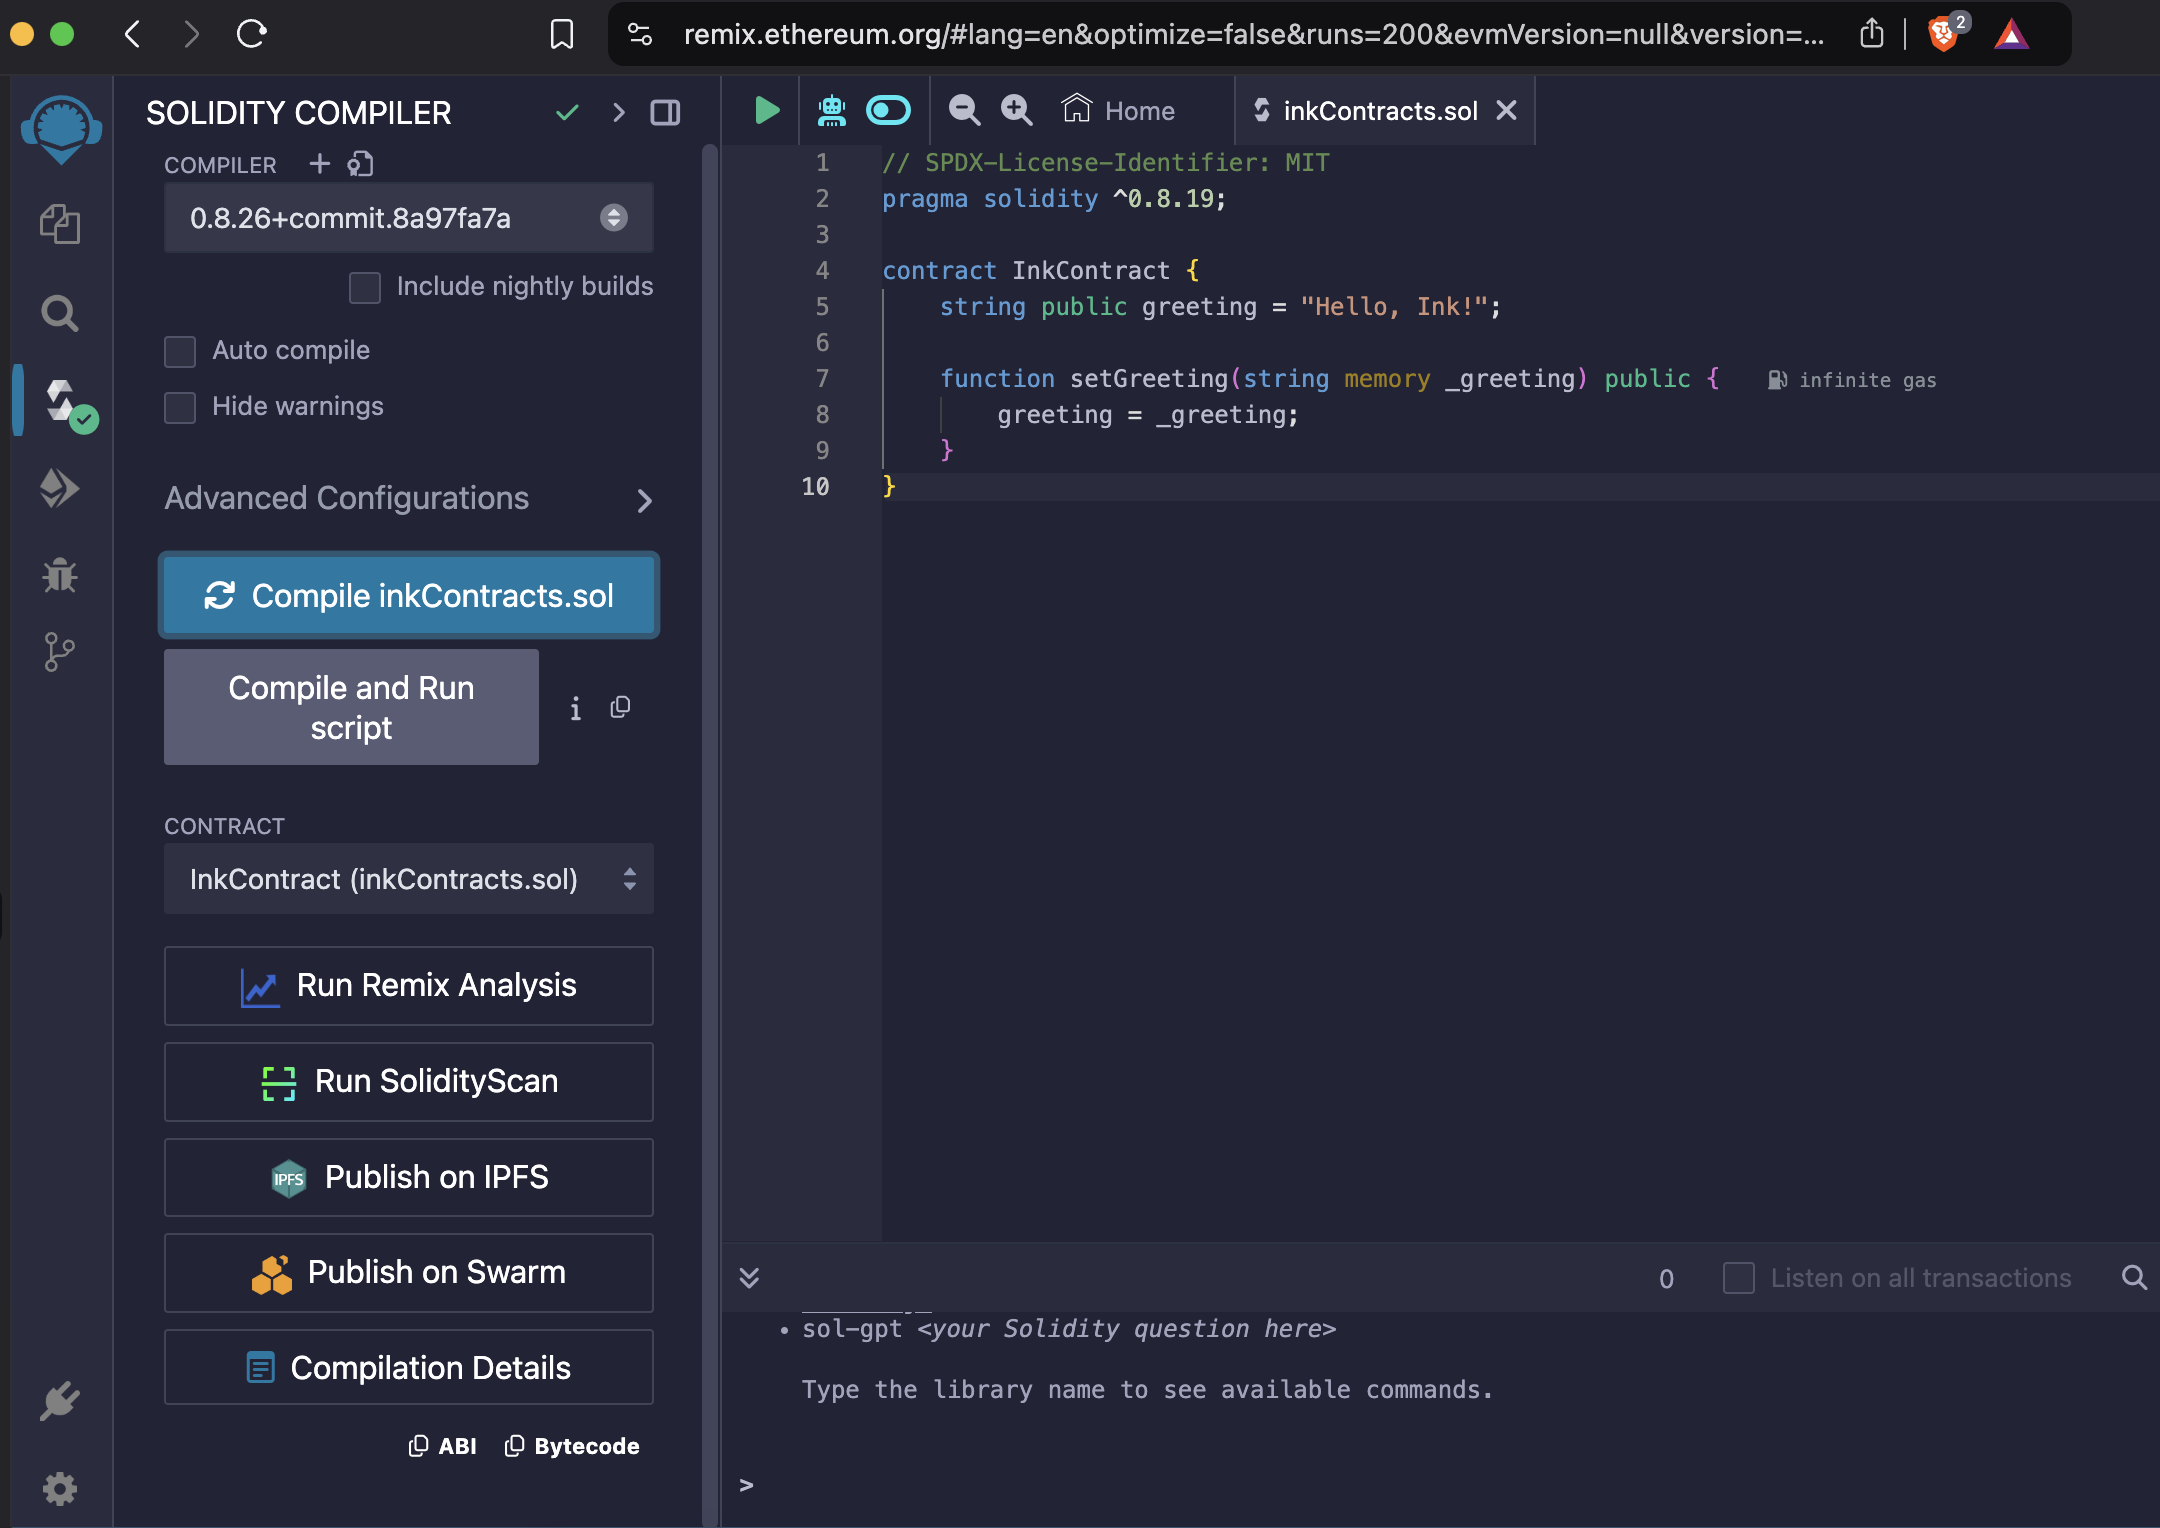
- Click on the
Solidity Compilertab in the left sidebar (icon looks like an "S") - Make sure the compiler version matches your pragma statement (0.8.19)
- Click
Compile InkContract.sol - Look for a green checkmark indicating successful compilation
Connecting to Ink Network
- On the left sidebar, click the
Deploy & run transactionstab (represented by a deployment arrow icon ▶️) - In the
ENVIRONMENTdropdown:- If you see
Injected Provider, select it - If not visible, click
Customize this list...in dropdown - In the opened "Environment Explorer" window, under "Deploy using a Browser Extension" section, select
Injected Provider - [WALLET_NAME], where [WALLET_NAME] is your connected Web3 wallet (e.g., MetaMask, Rabby)
- If you see
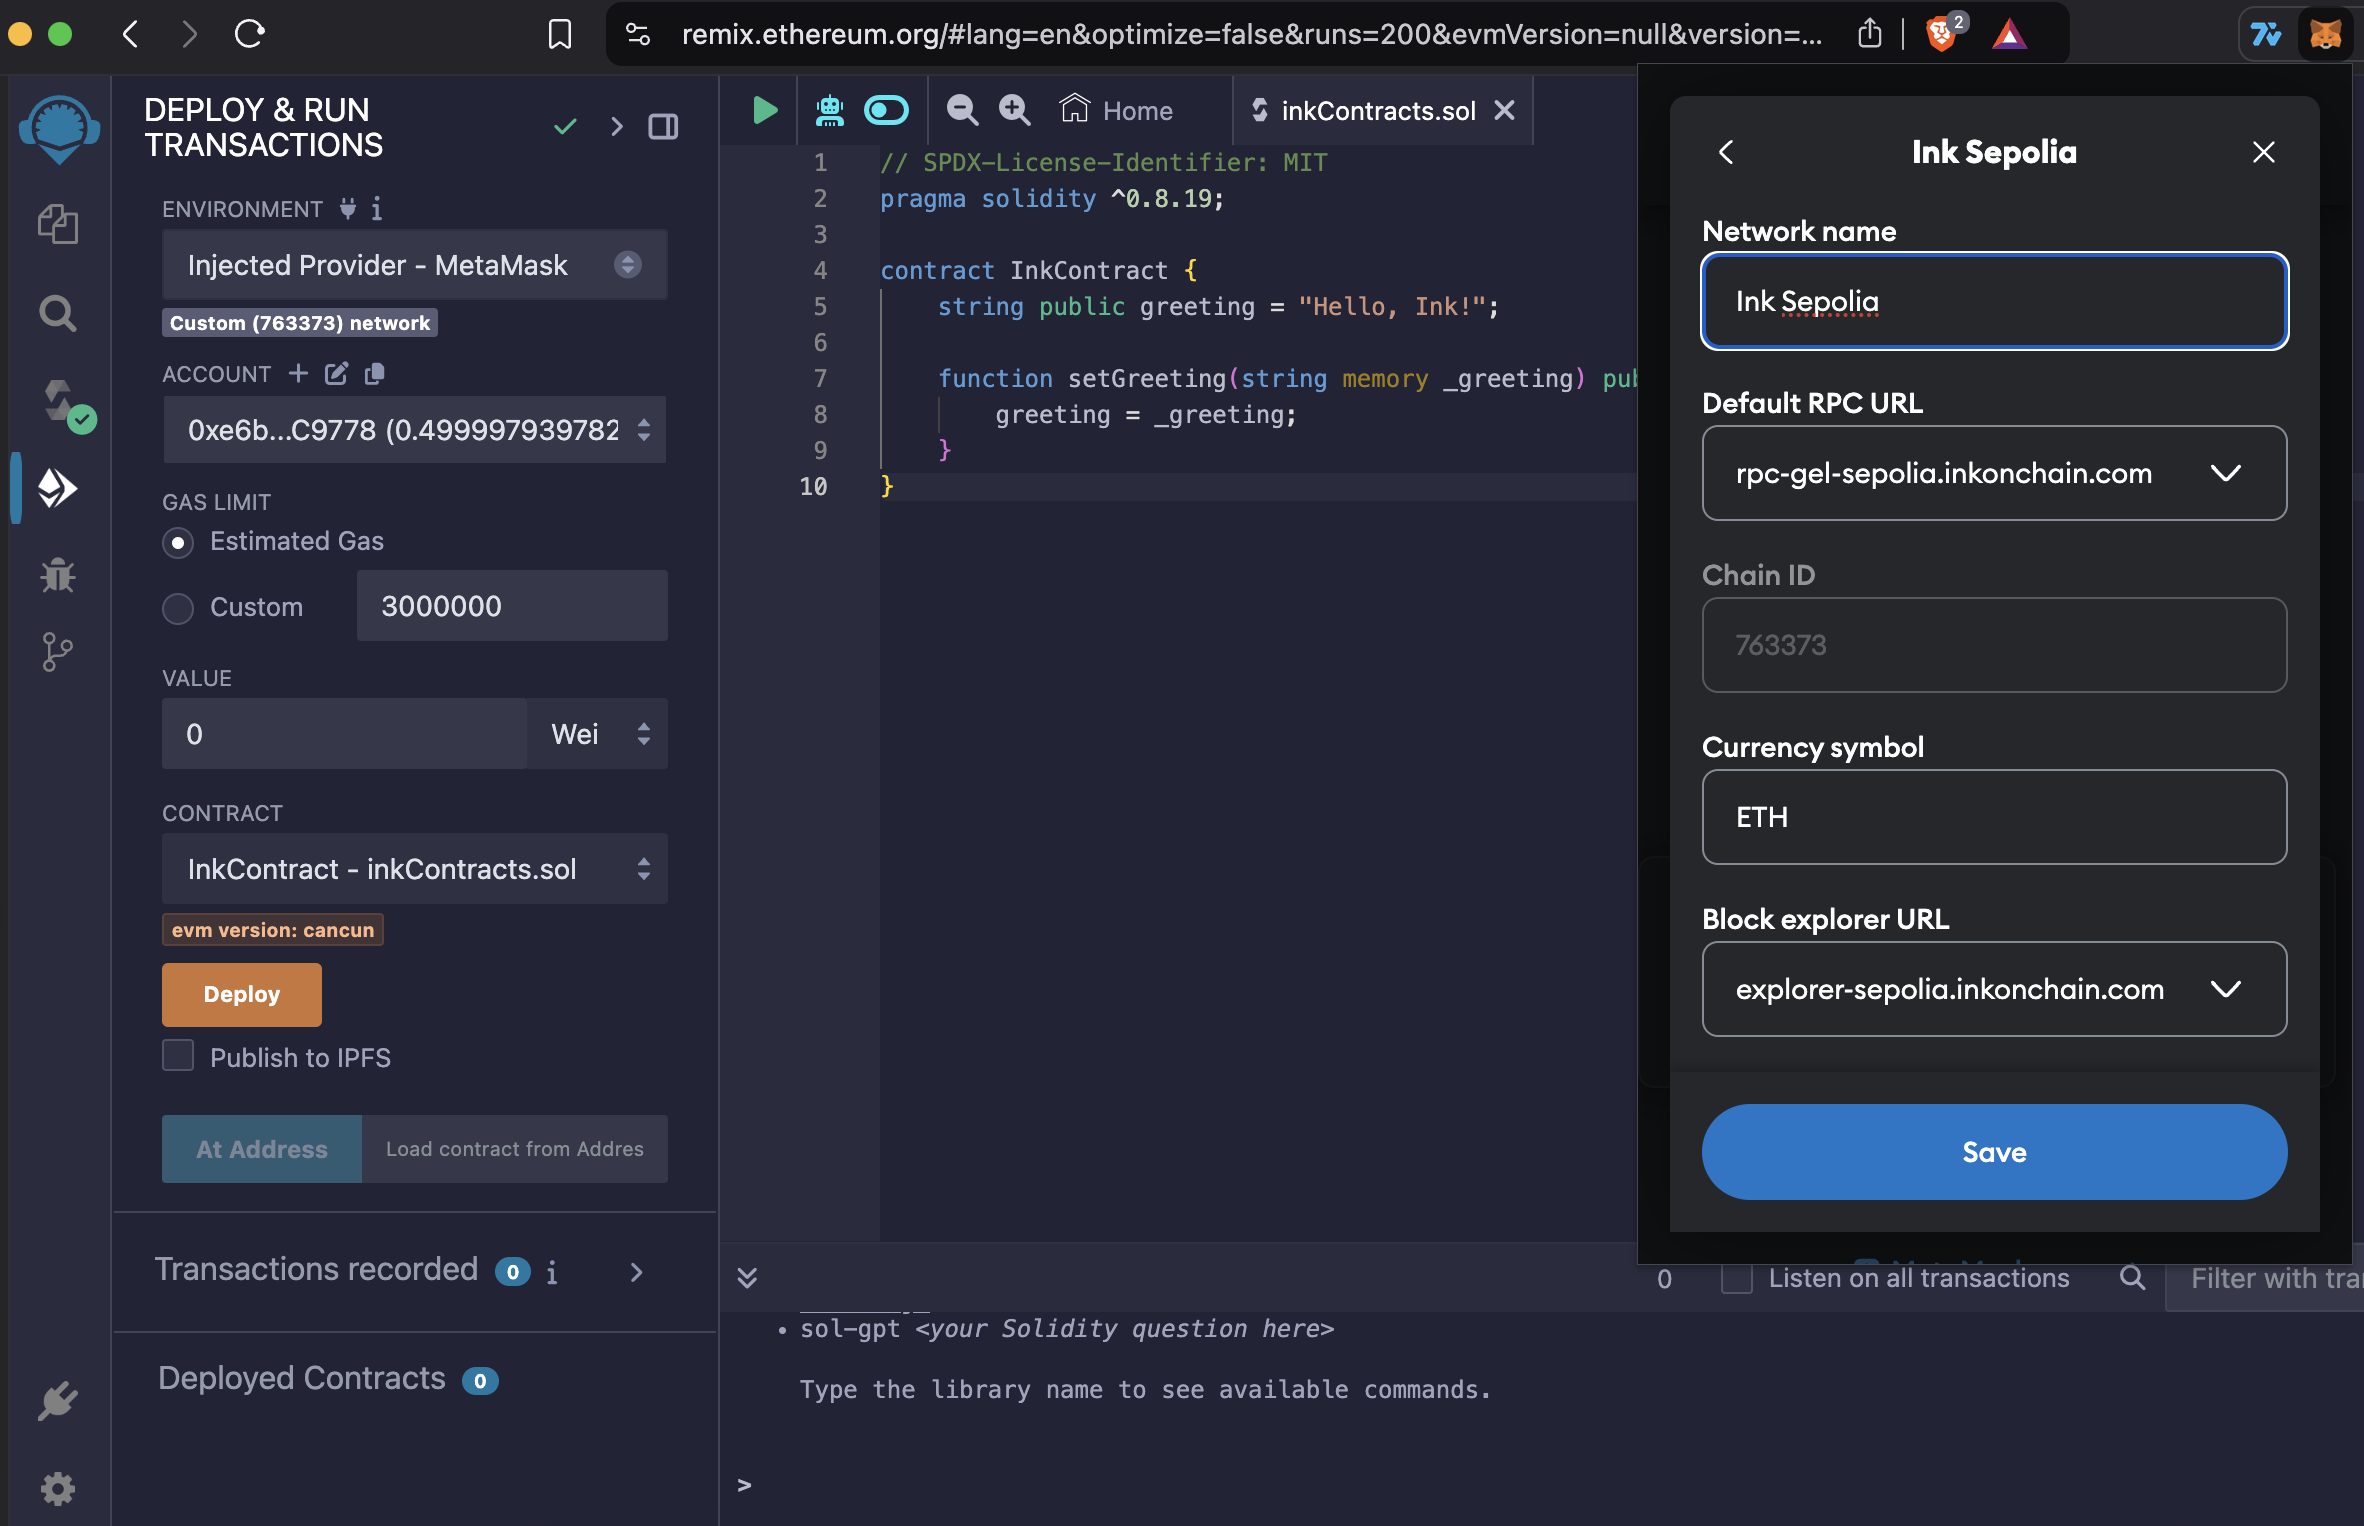
- Configure your preferred Web3 wallet with Ink Sepolia network details:
- Network Name: Ink Sepolia
- RPC URL: https://rpc-gel-sepolia.inkonchain.com/
- Chain ID: 763373
- Currency Symbol: Ink
- Block Explorer URL: https://explorer-sepolia.inkonchain.com/
Most modern Web3 wallets will allow you to add custom networks through their settings. Look for options like Add Network, Custom RPC, or Networks in your wallet's interface.
Deploying Your Contract
-
Before deploying, ensure:
- Your Web3 wallet is connected to Ink Sepolia network
- You have sufficient ETH for deployment
- Your wallet is connected to Remix IDE (accept the connection prompt if shown)
-
In the "Deploy & Run Transactions" tab:
- Select
InkContractfrom theCONTRACTdropdown - Click
Deploy - A popup from your wallet will appear - review and confirm the transaction
- Select
-
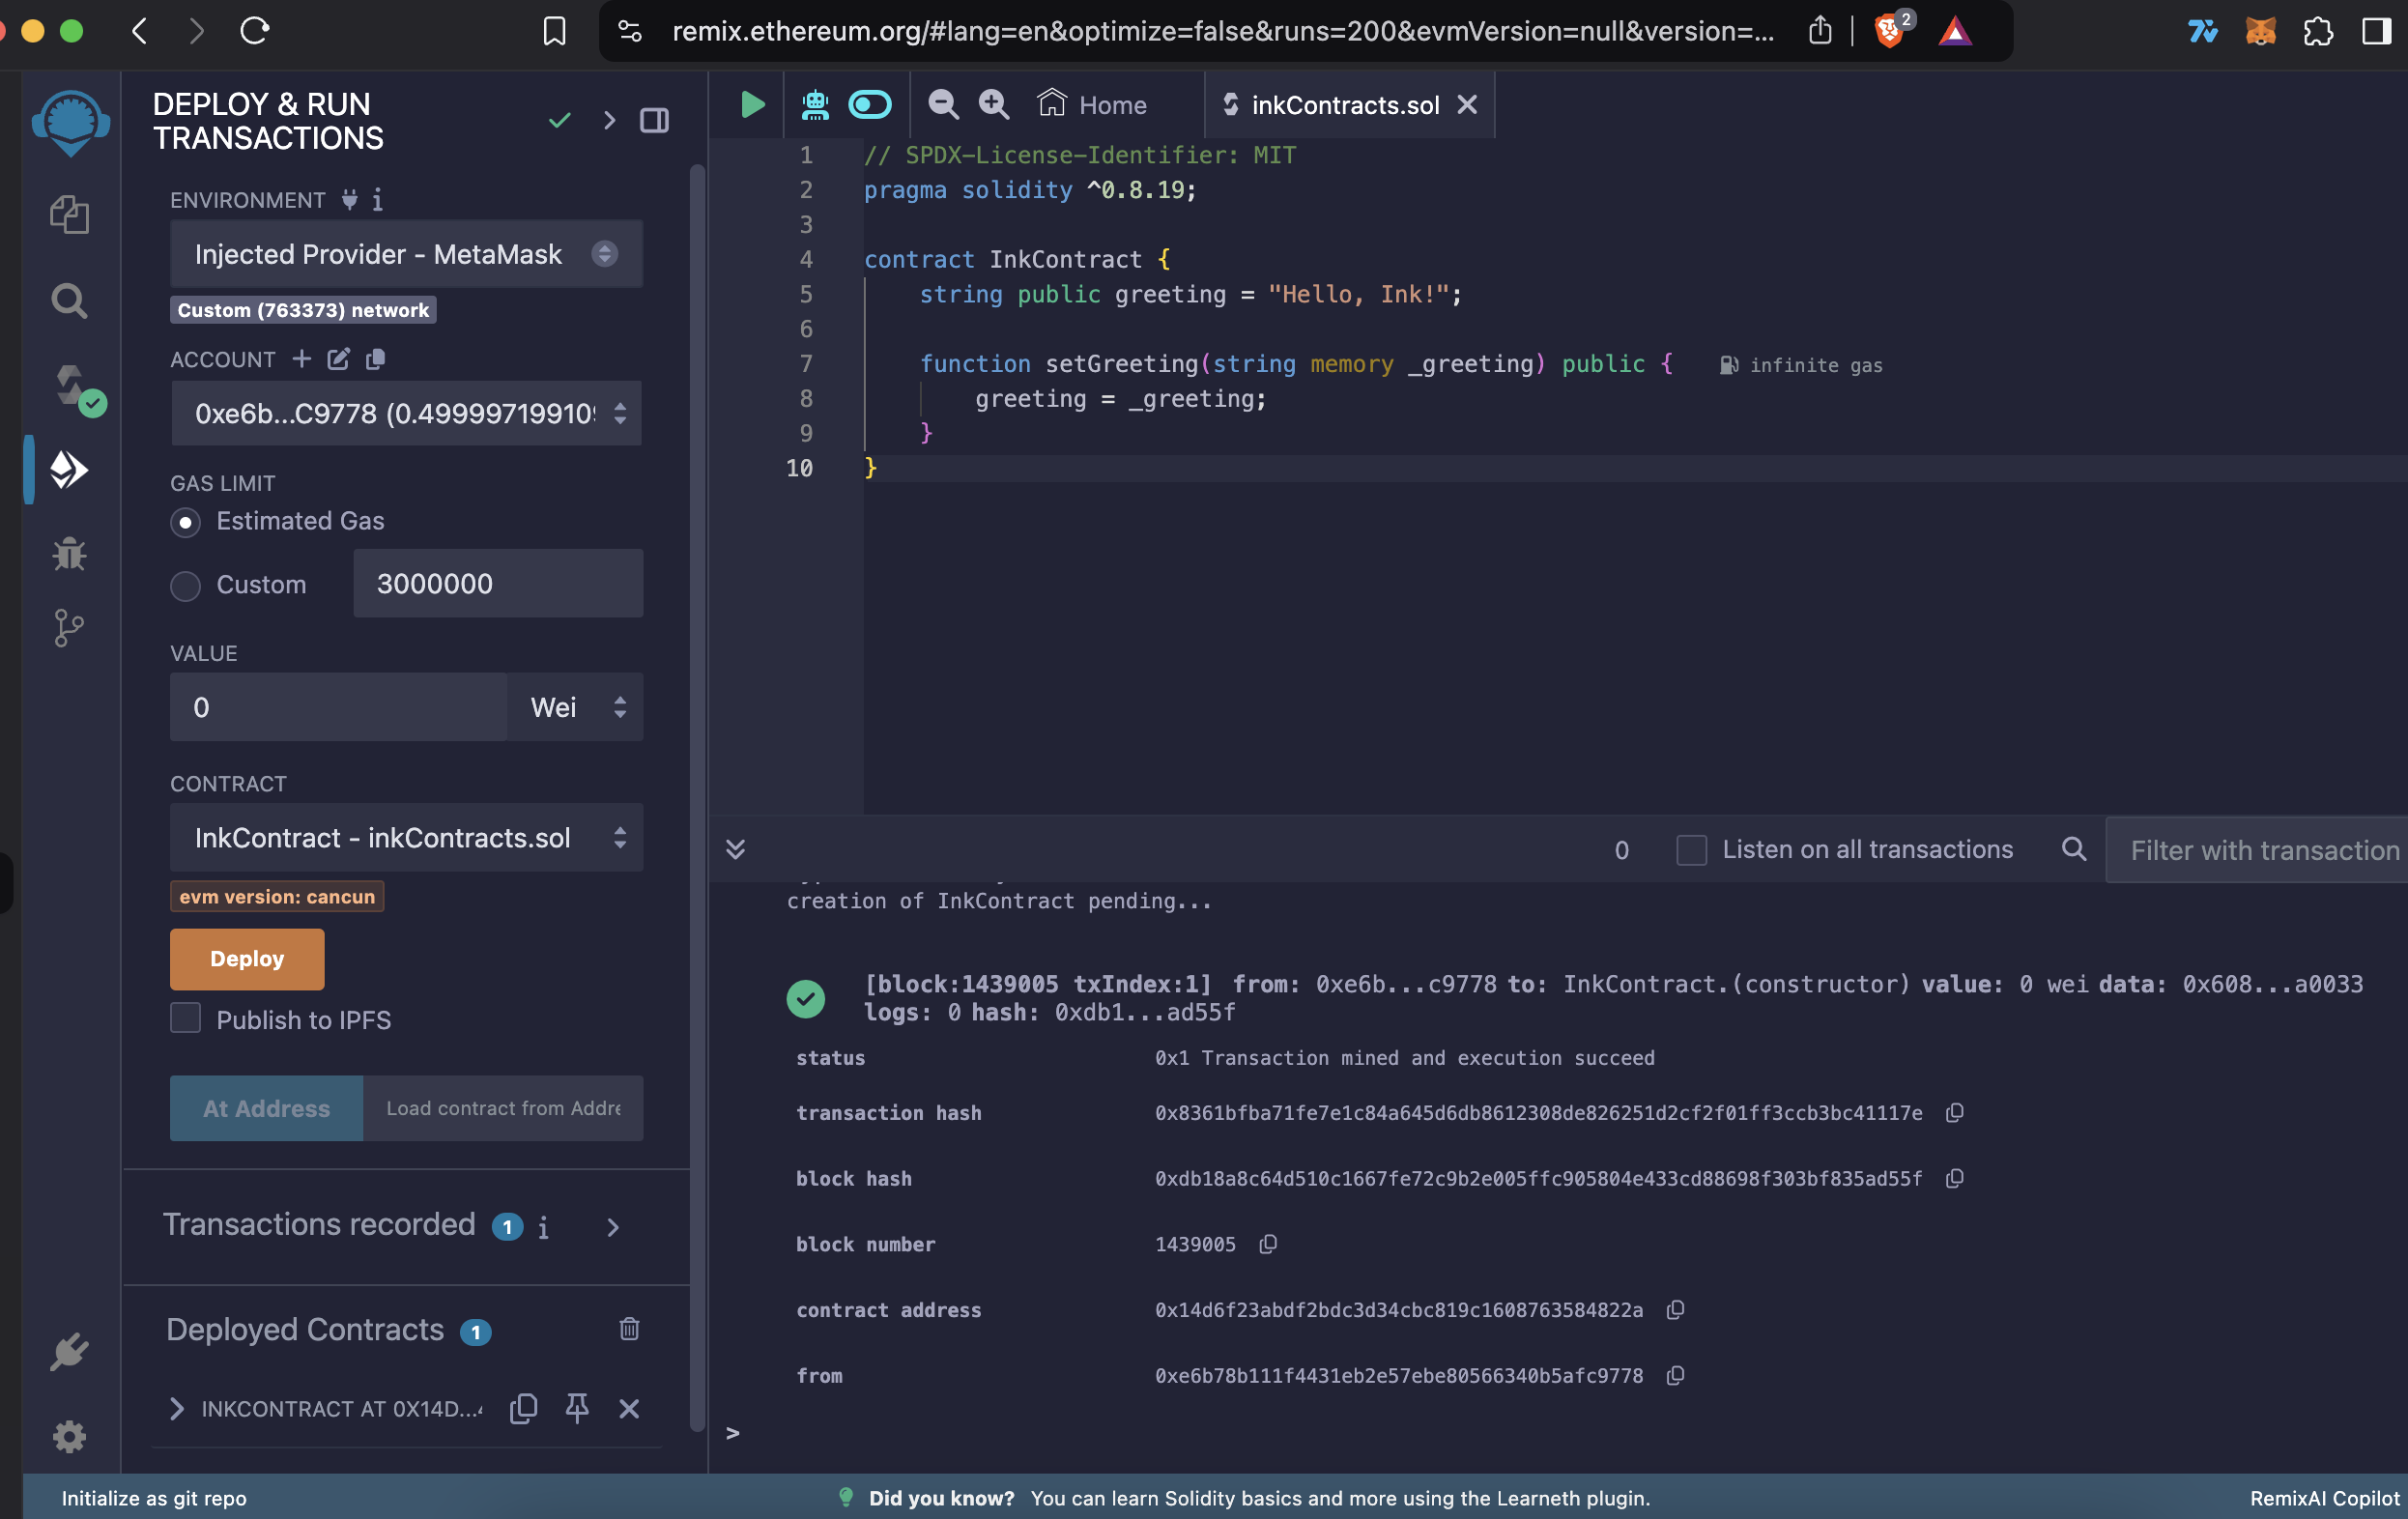
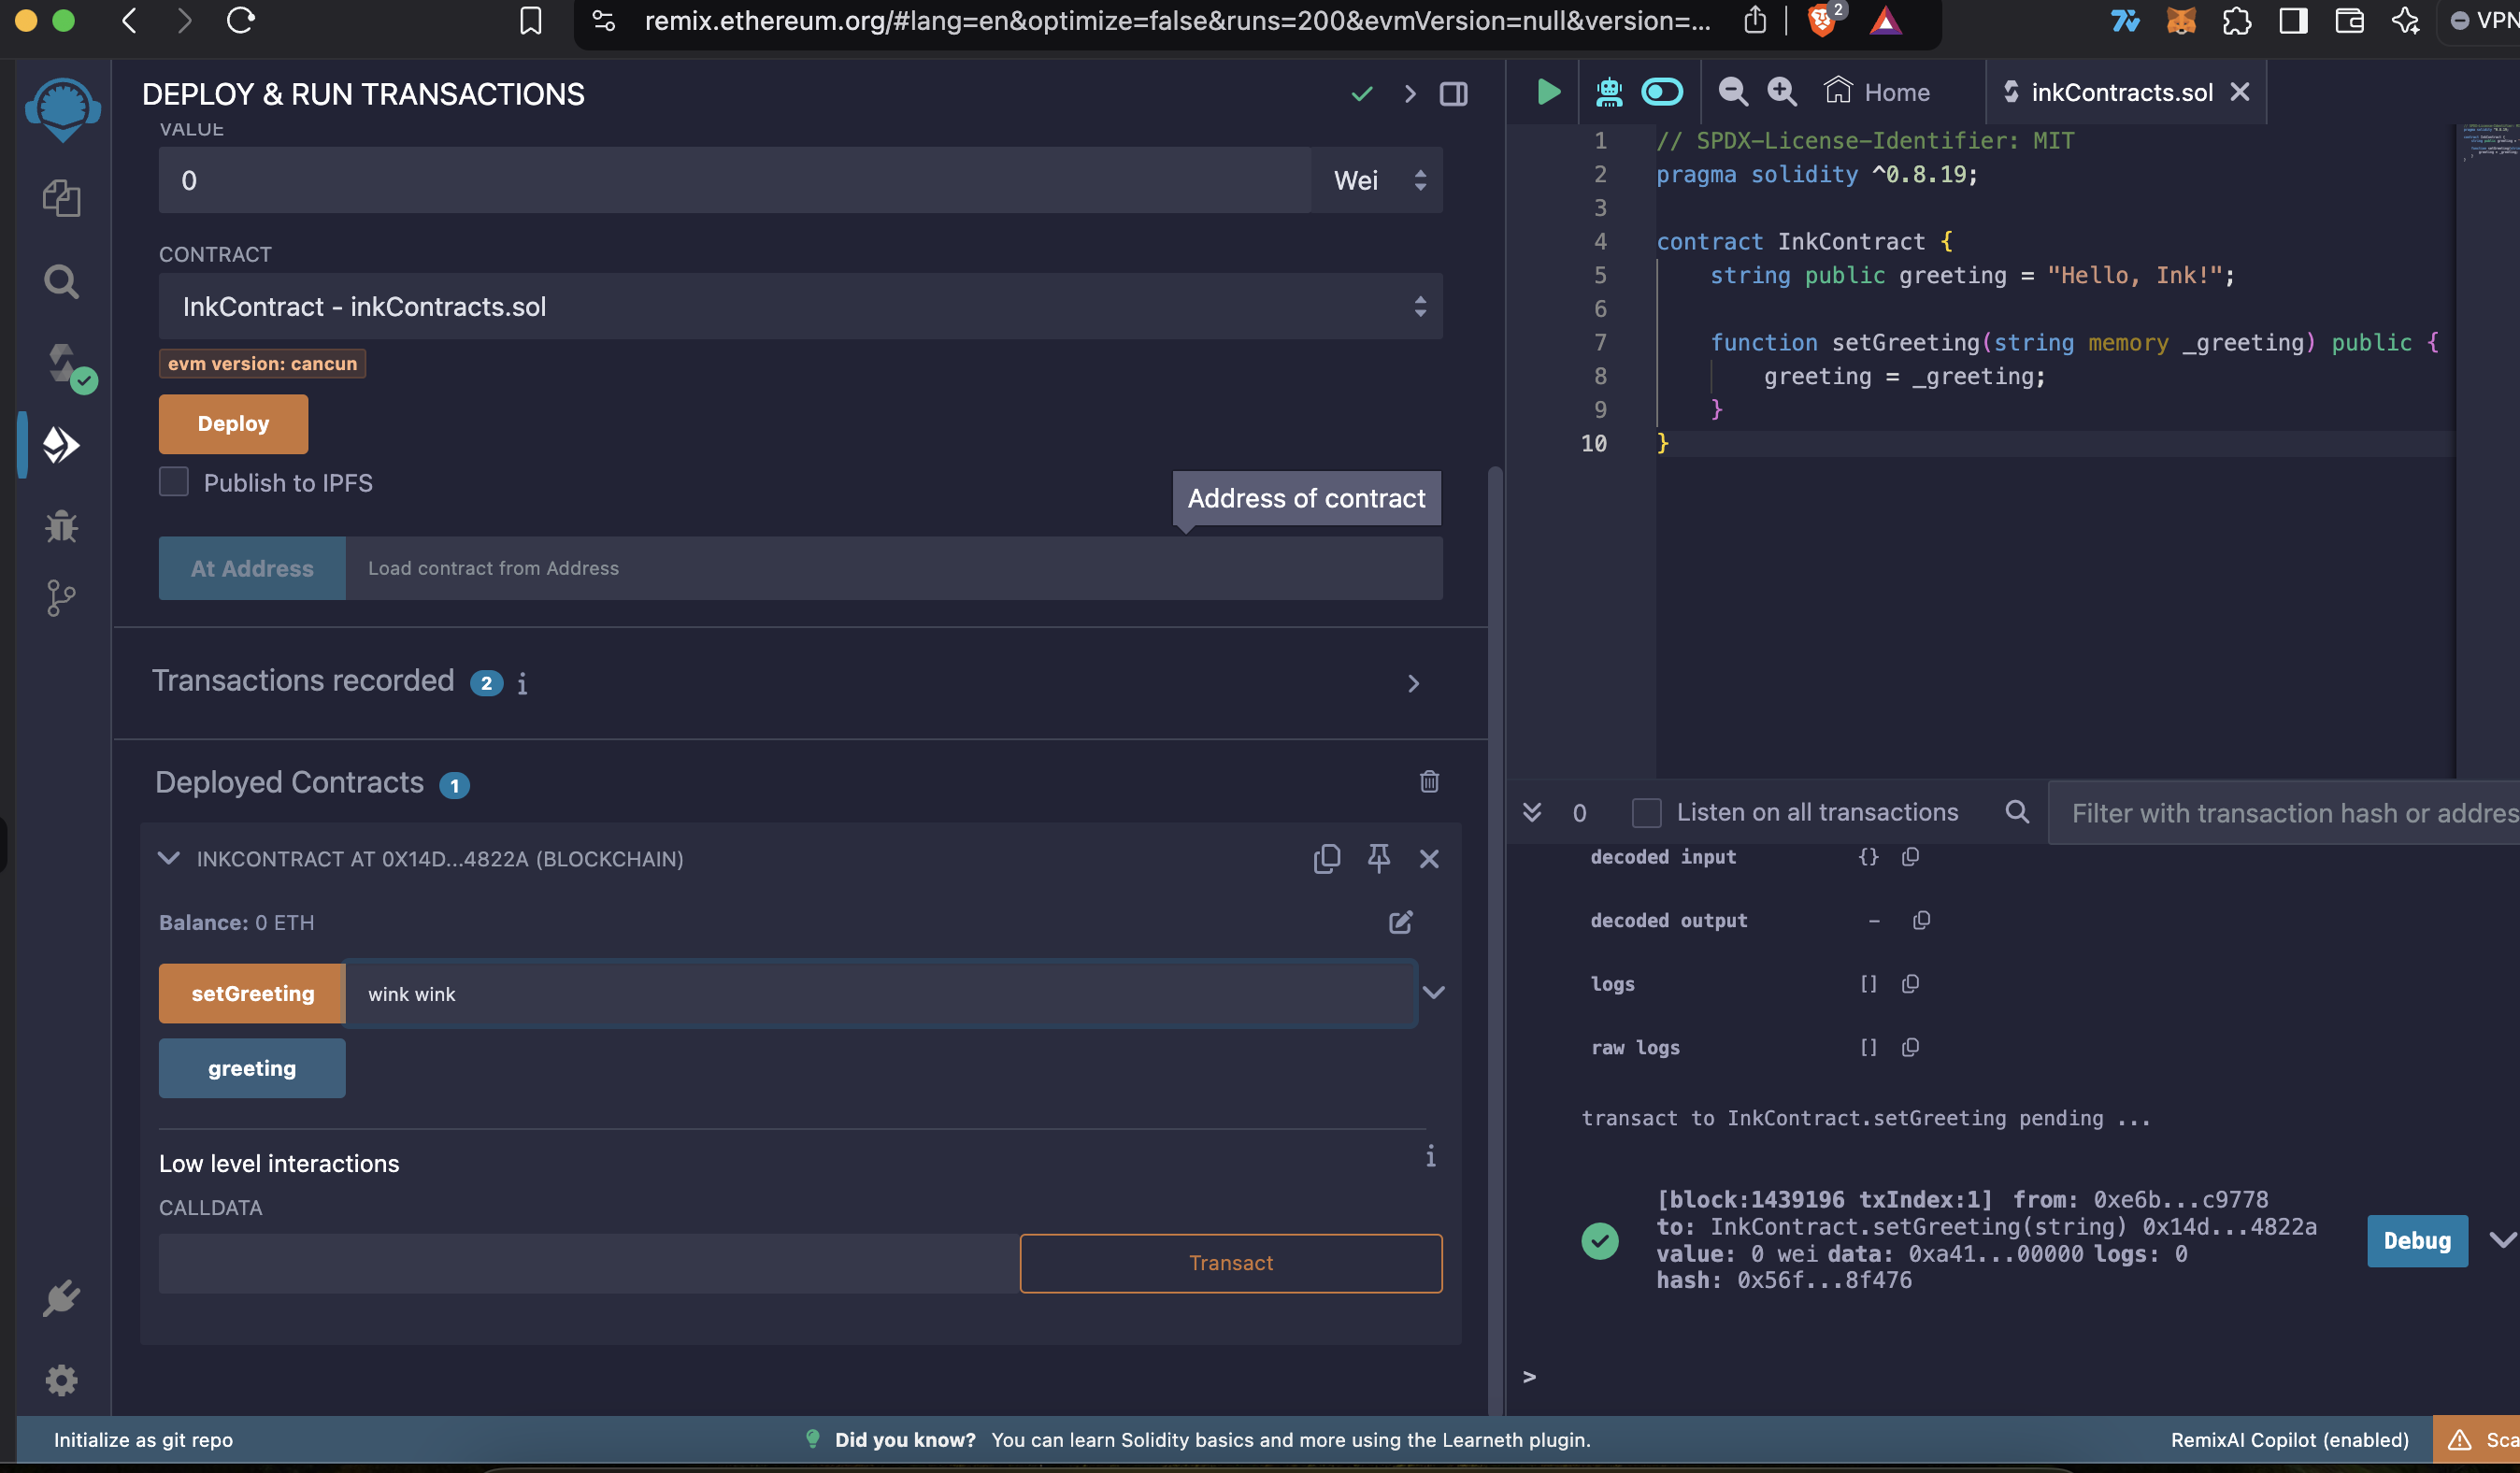
Once deployed, you'll see your contract appear under
Deployed Contractsin the left lower corner of the window.
Interacting with Your Contract
- Under
Deployed Contracts, expand your contract to see its functions - You can:
- Read the current greeting by clicking
greeting - Set a new greeting by:
- Typing a new message in the
setGreetinginput field - Clicking
transact - Confirming the transaction in your wallet
- Typing a new message in the
- Read the current greeting by clicking
Verifying Your Contract
See also the respective tutorial.
- Go to Ink Blockscout
- Find your contract by its address
- Click
Verify & Publish - Fill in the verification details:
- Choose
Solidity (Single file) - Select the same compiler version used in Remix
- Set optimization to 200 runs
- Paste your contract code
- Click
Verify & Publish
- Choose
Make sure to verify whether optimization is on or off in Remix Compiler's Advanced Configuration as this can affect verification success.
Tips and Best Practices
- Always test your contracts in Remix's JavaScript VM before deploying to testnet
- Use the Remix debugger to troubleshoot failed transactions
- Save your contract's address after deployment
- Keep your wallet secure and never share your private keys
Useful Features in Remix
- Debugger: Helps you understand why transactions fail
- Static Analysis: Checks your code for common issues
- Gas Estimation: Shows approximate deployment costs
- Console: Displays transaction logs and debugging information
Next Steps
- Explore Remix Documentation for advanced features
- Learn about Solidity programming